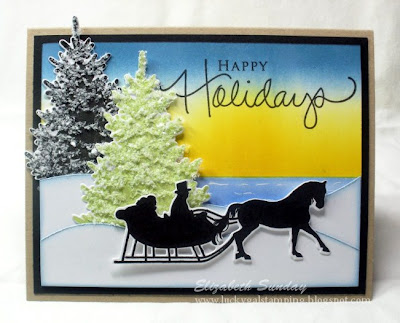
****Be warned that this is a very long post with lots of
pictures and details!****
If you are all addicted to Pinterest as much as I am, you
will have a bunch of pins with links to free printables. I personally love the printable tags and
cupcake toppers. Most of these are
downloaded in Adobe Acrobat format. This
is great if you want to print and cut by hand.
However, I was a lucky girl and received a Silhouette Cameo for
Christmas. I was curious if I could put
my new machine to work and have it cut some of these items. I have been using the Silhouette Studio
(Designer Edition) software with my Cameo.
The problem is that the software does not support images in Adobe format. My disappointment in that fact was quickly
alleviated after a quick Google search.
Mind you, I am not very technologically savvy, so I was pleasantly
surprised to learn that I could quickly change the format of the images I wanted
with tools already available on my computer.
This information was completely new to me and has opened a wide range of
possibilities for using my Cameo. I
thought I would do a photo tutorial to show exactly how I went about taking an
image from one of my Adobe documents, converting it for use in my Silhouette Studio
software, and finally making the image a cut file.
For this particular tutorial, I will be using a free
printable template for an envelope liner from Papertrey Ink, available on their website
here. PTI also sells an A2 envelope liner die. It is a lot more polished looking with its
rounded corners and all. This particular
tutorial will only give you the basic shape available in their printable
template, not the lovely look you get with their die. Envelope liners really add a wonderful detail
to your handmade cards, so I recommend using one whether you hand make one, purchase a die, or make your own cut file for an electronic cutter. It is also a great way to use all that
pattern paper we seem to collect.
The shape available in the template is very simple and would
be very easy to hand cut. This shape
could also be easily made from scratch in your Studio program, which gives you
the added benefit of tweaking the shape even more. Although this is a simple shape, the steps
used can be applied to more complicated and detailed images. So let’s get to it!
Go ahead and open the Adobe document that contains the
images you want. There are two very easy
ways to convert images from an Adobe file for use in your Silhouette
Studio. The easiest way is to use your
computer’s Snipping Tool. If you don’t
know what this is, look for it now (see photo below). I
just recently learned about this tool and now have it saved in my quick start
menu. I use it all the time. Who knew?!?
For Window’s Vista or 7 users, you can locate this tool by opening the
Start window and typing Snipping tool in the search area. For Window’s XP or earlier users, I believe
you can get this tool as a download from Microsoft.
 |
| How to find Snipping Tool |
Once the tool is open, it will prompt you to make a box
around the image that you want. Go ahead
and make a box around the particular image you need, then another box will open with your snipped image.
 |
| Snipping Tool Screen |
From here, you can either save the image or just copy and paste (my preference) in Studio. The Snipping tool automatically converts the image to jpeg format, which is compatible with Studio.
 |
| Save As (or) |
 |
| Copy |
If this tool is not available on your computer, you can just as easily
use the Print Screen function. When you
have your document open and the full image on the screen, hit your Print Screen
button. Now open your Microsoft Paint
program, which is usually found under accessories. Use the Ctrl+V function to paste the image in
the Paint program. Save the file as a
jpeg image. All you need to do from here
is open up the file in Studio.
How easy was that?
Keep in mind that this is the very basic and easy option for converting
the images. Both of these functions are
essentially taking a picture of a picture.
I have noticed that the image quality deteriorates a bit. For line images it is not a big deal. However, very detailed images or words do not
appear as sharp and may not look as good if you are using the print and cut
feature on the Cameo. There are websites
and other programs available that will convert the files for you. I do not have experience with this and
cannot offer any advice on the subject.
I figure for my use, the two methods listed above will be just fine.
Once you have your file opened up in Studio, you will have
to do some work to make it a cut file.
If you cut the image as is, it would just cut a box around the
image. Your next step is to open up your Trace window and click on Select trace area.
 |
| Opening Trace Window |
Highlight your image as near to the image as possible, avoiding the
outer edge of the original image. Then
select Trace outer edge. You could trace
the entire image, but this added several more steps to the process.
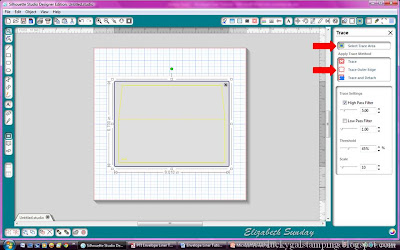 |
| Select Trace Area and Trace Outer Edge |
Next I moved the original image and lined it
up next to trace image. I used the original image as a guide for drawing the interior line.
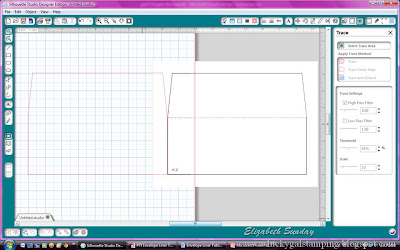 |
| Moving original image and lining up with trace image |
Use the Draw a Line tool and make a straight line on the interior of your trace image, lining up with original image.
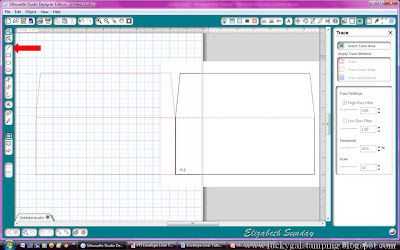 |
| Drawing the interior line |
This is an optional step. You could just cut the outline of the
envelope liner and use your score tool to manually add your score line after
you cut it out. Once that is done, you
can delete the original image. You are
now working with the trace image. Select
the whole image and group the shapes together.
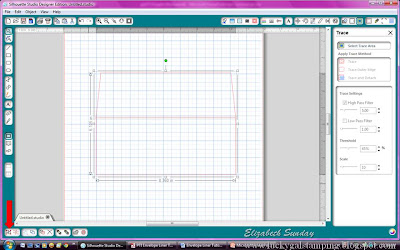 |
| Select and group shapes |
Now open the Scale window. Lock
the aspect ratio and enter in your desired dimensions. In this case I used 5.50 for the width and the height automatically scaled to 4.015.
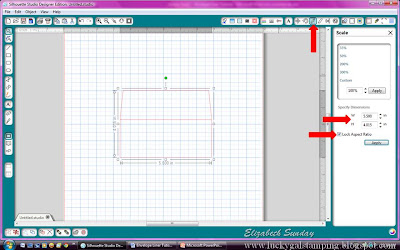 |
| Open Scale Window, Lock Aspect Ration, and set dimensions |
Now select the whole image again and ungroup.
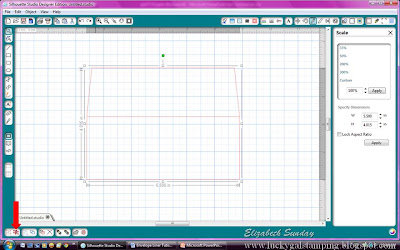 |
| Ungroup Image |
Open the Cut Style window. Make sure your outer edge is set to cut. Select the inside line and change this to
perforate. Another way of doing this is
to have created a dashed line in your Line Style window when you created your
interior line, then make sure all lines are set to cut.
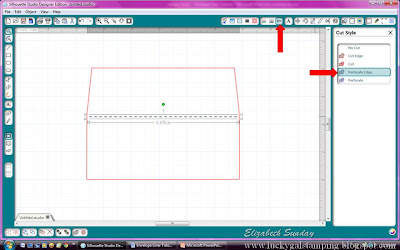 |
| Cut Style Window and Perforating Line |
Finally, select the entire image and group all shapes together
again so you can place it on the mat where you need to cut.
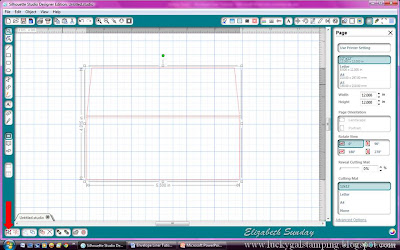 |
| Group Shape |
That is all there is to it. Don't forget to save your work! You are now ready to cut envelope liners for all your cards. Once you know how to do this, it really does
open a lot of possibilities for using images with your Cameo. Just remember to follow the copyright policy
set forth from the creator of the document you are using. Happy Cutting!


